WATCH: How to Repair the Broken RAID Clips on a Dell 12th Gen Server

Transcript:
The blue clips that secure a mini-RAID controller in the Dell 12th Generation servers are prone to break after exposure to heat over an extended time.
In this tutorial, we’ll show you how you can replace these broken RAID clips to ensure your mini-RAID controller is securely connected to the motherboard.
The process will involve disconnecting all components from the motherboard so that you can access the bottom and screw in new clips.
Tools Needed:
- A Phillip’s Head Screwdriver
- New 12th Gen Dell RAID clips
The server we are illustrating this process on is an R720XD.
Here you can see the RAID clips behind the processor. A close-up photo illustrated the discoloration and brittleness of the broken clips.


| COMPATIBILITY PAIN POINT! Clips from an R620 or an R420 will work in an R720. However, clips from an R720 will NOT work an R620 or R420! |
With all components disconnected, pull up on the blue pin and slide in the direction of the arrow.

Then, very, very gently, pull the motherboard out.
The new clips you are installing should have a consistent, solid blue color suggesting they have better integrity than the damaged ones.
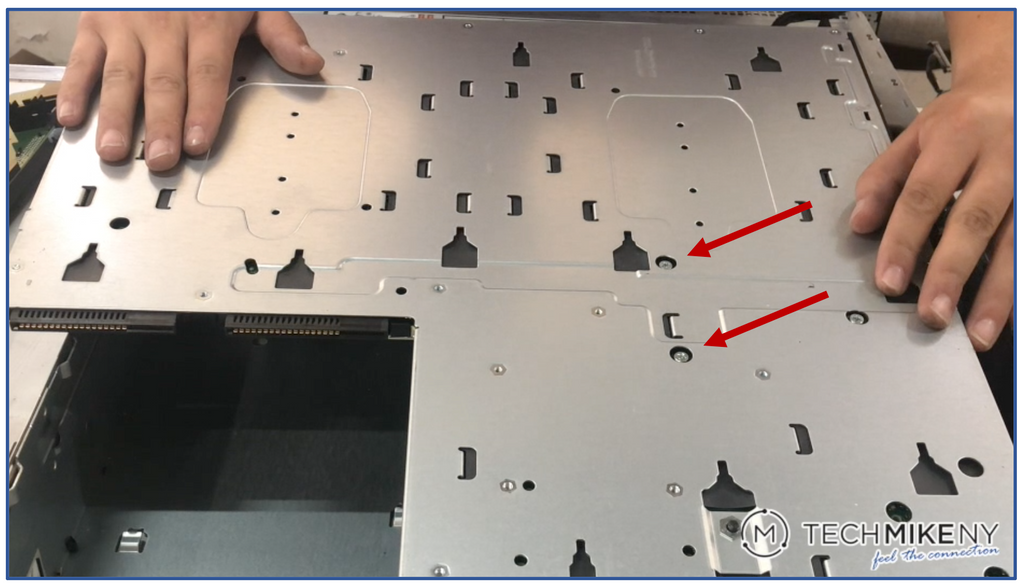
Carefully flip the motherboard over. The two parallel screws are the ones securing the current RAID clips in place.

Unscrew those screws. Then when flipping the motherboard right side up, keep your hand underneath to catch the screws as they fall out. We’ll be reusing them for the new clips.
When installing clips, note that each clip has a slightly different contour. This contour is to ensure the placement in the correct socket.

|
NOTE: The clips are NOT interchangeable between each socket. |
When you feel the clip secure in the socket, carefully flip the motherboard back upside down – while keeping the clip in place.
Make a visual confirmation that the clip is flush against the socket. Then screw in the new clip.
You can test the newly installed clip to confirm it is secure and functioning by pressing on its lever.
Repeat the process for the other clip: seating the clip in the socket, holding it in place as you flip the board upside down, and inserting the screw.

You can confirm that both clips are secure and moving correctly.
You will then need to reseat the motherboard and reattach all cables and components – taking care to ensure that no screws or other loose bits fell onto the server’s base panel.
| NOTE: Sometimes, cables will be contoured in a way that makes them want to rest on the base. Carefully move them out of the way. |
Slide the motherboard back into place – you should hear a click and confirm that the blue pin has recessed back and locked the board in the server.
Reconnect all cables and components, retracing your steps from everything you disconnected.


