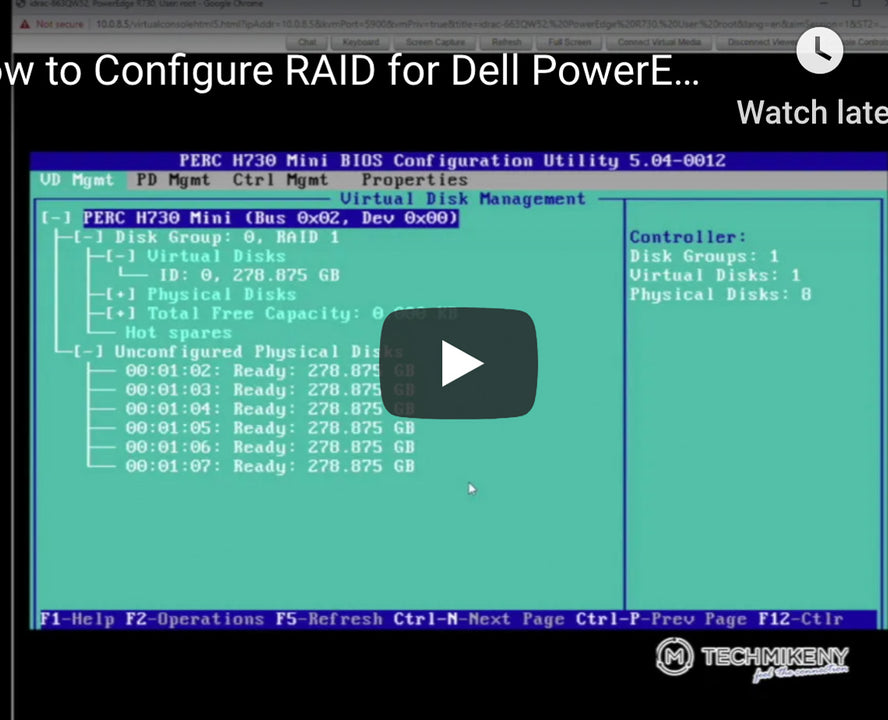
Our customers often ask for assistance in setting up a RAID array in their new TechMikeNY server. In this video tutorial, we’ll provide step-by-step instructions for how to set-up a RAID array in a Dell PowerEdge server. The PERC – or PowerEdge Raid Controller – is an H730, and the server is a Dell R730 – but the steps are virtually identical between all Dell PowerEdge servers.
When the boot menu pops up → Press CTRL + R.

This will bring up a list of the physical disks available for configuration into a RAID array.

Click F2 (Operations) → Clear Config. This ensures that you are removing any previous RAID configuration that existed on the controller and disks.

Click Yes.
Now with all previous configurations cleared, we can create our new Virtual Disk.
Select the PERC → Create New VD.

Since our server has seven drives, it is standard to make the first two drives RAID 1. As a refresher, RAID 1 mirrors the data across both drives, creating a copy.
Click Ok.

This will return to the main PERC menu, where you can initialize the virtual disks.
Select the newly created Virtual Disk. Click F2 again, select Initialization → Fast Init.
Click Ok.

This will complete the Initiation on this first virtual disk.
We can now use the remaining drives left in the server to create other virtual disks.
To do so, we repeat the process that we performed on the first virtual disk creation.
Select the PERC controller at the top of the menu. Click F2 (Operations) → Create new VD.

You can select RAID 5, as shown in our configuration here, or RAID 10 (which is typically faster).

We recommend keeping one drive as a hot-swappable spare. You’ll notice here [in the above grab] we left one drive off the array – this will be our hot-swap spare.
From the Advanced Menu, check Configure Hot Spare.

The Hot Spare then needs to be manually enabled. A prompt will appear for the drive(s) to be selected to serve as the spare. Click Ok.

This configuration will allow you to have two failed drives without loss of any data. If one drive fails, then the hot-swap spare will automatically take over the failed drive functions. While this particular configuration could withstand another failed drive, it is recommended that you replace failed drives as soon as possible.
We then repeat the initialization process for the second VD we created.
Select our newly created RAID Disk Group → Click F2 (Operations) → Initialization → Fast Init. → Click Yes.

As before, the Initialization complete notification will pop up. Click Ok.
With the virtual disks set-up, click Esc. To exit the configuration menu.
You will then be prompted to Press Control+Alt+Delete to reboot the system.
For additional resources on RAID, you can view our TechTalk blog, which has posts on Raid Controller Basics and Considerations; as well as a post on compatibility pitfalls for 4Kn Hard Drives & Backwards RAID Controllers. Lastly, never hesitate to reach out to us at info@techmikeny.com if you ever have any questions.


8 comments
I HAVE INSTALLED 64GB RAM AND 2TB X3 HDD( 3.5" SWAP
REGARDS
CHIKA
Hi Faisal. You can follow the instructions in the video tutorial, however, you would skip the first step of creating 2 drives with RAID 1 and go right to the creation of the RAID 5 VD using your 3 drives. If you want to have a hot spare drive, then a 4th drive would be required. In your case with no hotspare, add all three drives to a new virtual disk and set it to RAID 5. Note: 3 drives are the minimum amount of drives required to created a RAID 5 disk. Hope that helps!
i have server Dell poweredge R730 which have 3 hard drives each of capacity 500GB
i want to configure RAID5 on my server with above mentioned specs, please guide me whole the procedure step-wise?
how many virtual drives do ineed to create? etc….?
Thank you
Regards