WATCH: How to Do a Full System Reset on Your Server
By TechMike

Thinking about retiring your system or transforming it into a brand new server? Whether you're doing an overhaul of your Dell server or preparing to put it to rest, you'll need to do a full system reset. In this tutorial, we'll show you how to use Dell's Lifecycle Controller to do a full system reset on your server.
Step-by-step Tutorial
Let's get right into it.
-
Start by booting the server.
-
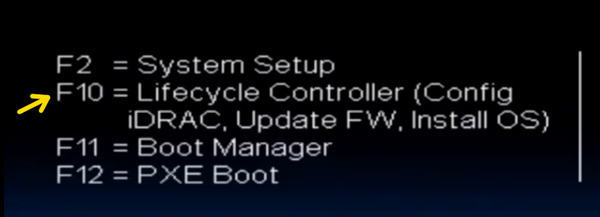
After the initialization process, select F10, the lifecycle controller.
-
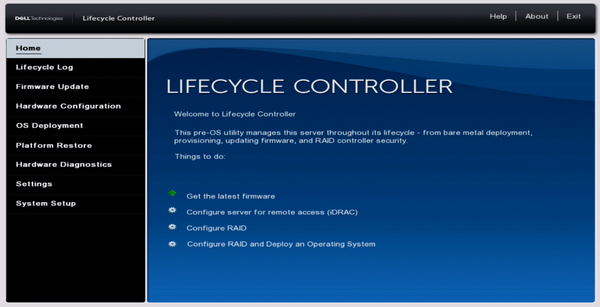
You’ll be shown the initial setup wizard. Hit cancel, and then yes, and you will be taken to the default Lifecycle Controller menu.
-
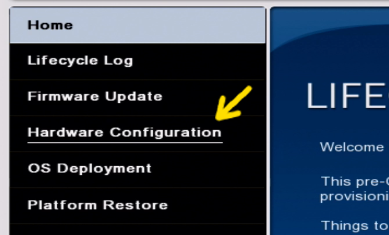
From there, go into the Hardware Configuration menu.
-
Select “Repurpose or Retire System”.

-
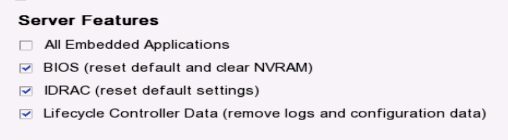
Select the server features you’re planning on resetting. To do a full system firmware reset, you’ll need to select BIOS, i-DRAC, and lifecycle controller data.
-
Once you’ve checked the right boxes, hit next. Make sure that only those 3 features are selected on the screen.
-
When you hit finish, you will be prompted with two system warnings. Accept both to launch the system configuration request.
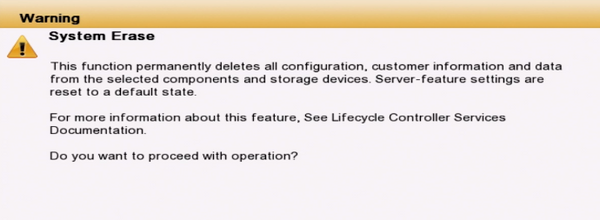
(The first warning is a reminder that everything will be wiped, and the second warning is a reminder that this action is final and cannot be undone.)
-
The configuration task is automatic, but if you’re curious, the menu on the left of the screen will show you what process is underway.
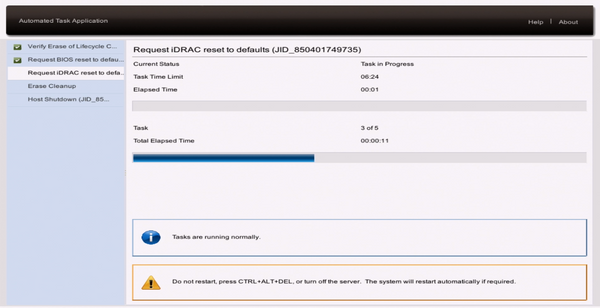
- As soon as the task is finished, your server will reboot.
And that's it! That’s how to do a full system reset on your server.


